An Element connects two Nodes with each other. It can have rotation releases (hinges) at each one of its ends (start i and/or end j) and it has to be assigned a Material and a Section.
Element properties
The Element user-defined properties are the following:
•Material ID
•Section ID
•Node i ID (Start Node)
•Node j ID (End Node)
•Hinge i (Hinge at Start Node i), Checked or Not Checked
•Hinge j (Hinge at End Node j), Checked or Not Checked
The derived Element properties (Read-only properties, calculated automatically by the program) are the following:
•Length: Length of the Element (in Length units, for example m). It is calculated based on the locations of the Start (i) and End (j) Nodes, as L=sqrt[(Xj-Xi)2+(Yj-Yi)2].
•Angle: Orientation Angle of the Element (in Angle units, for example deg), measured counter-clockwise from the horizontal. When the Angle is zero, the Element points to the right (+X Global axis).
•Volume: Volume of the Element (in Volume units, for example m3). It is calculated as the Length of the Element times the Area of the Cross section, V=L*A.
•Mass: Mass of the Element (in Mass units, for example kg). It is calculated as the Volume of the Element times the Density of the Material, M=V*d.
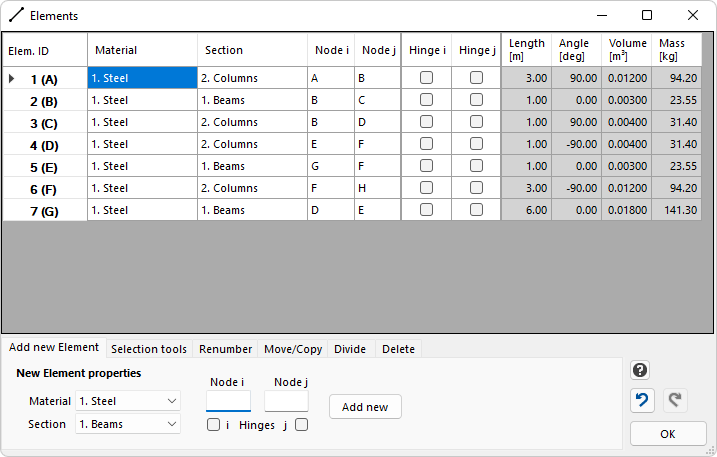
Add new Element
To add a new Element, select the Material and the Section and type the Start and End Nodes of the new Element. You can optionally add hinges to the new Element. Then click the "Add new" button.
Edit an existing Element
You can click on the table and you can easily edit the properties of an already existing Element. Any change you make is automatically reflected to the Model on the screen.
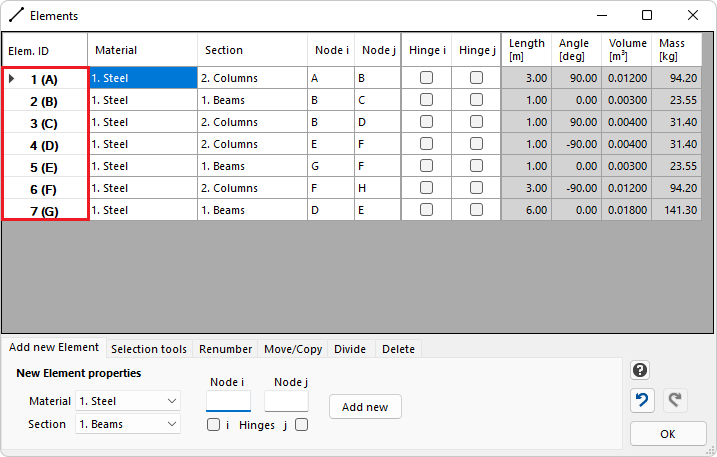
Select existing Element(s)
You can click on a row number to select one or more Elements. Then you can apply actions to the selected Elements (renumber, move/copy, divide, delete, etc).
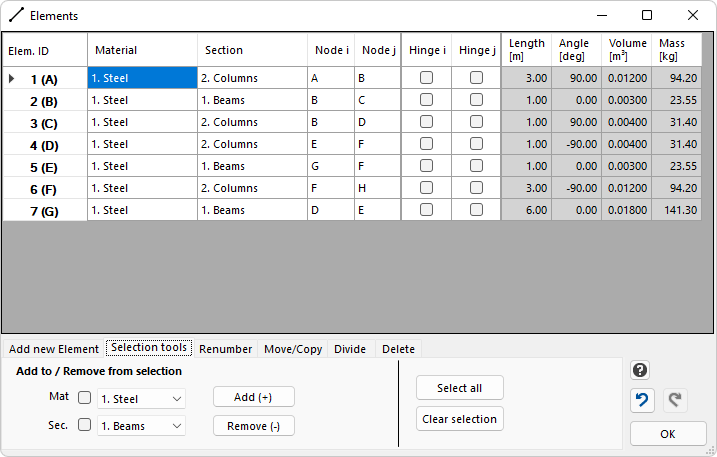
Selection tools
This tab provides tools for the selection of Elements. For example, you can select (add to selection) or deselect (remove from selection) all the Elements that are assigned a specific Material and/or a specific Section. This is useful when for example you need to Delete all the Elements with a specific Section. You can also Select all Elements, or Clear the selection.
Renumber Elements
In order to perform this action, first you have to select the entire row(s) of the corresponding Element(s) and then apply the action.
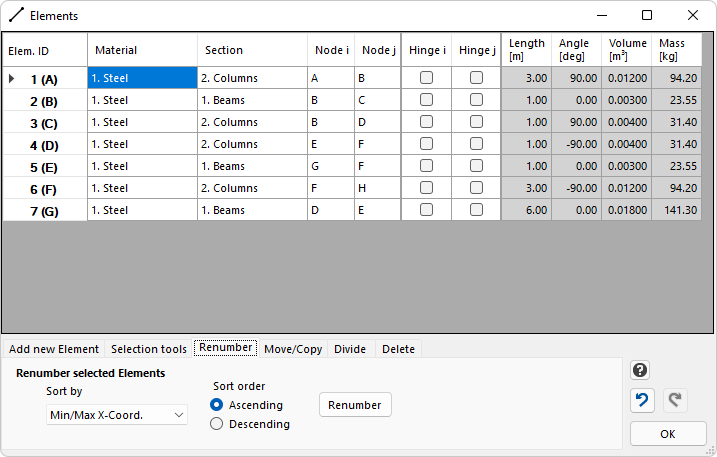
This tool is for the renumbering of (the selected) Elements, based on various criteria:
•"Min/Max X-Coord.": If the sort order is "Ascending", then the Min X-Coordinate of the Element is used. If the sort order is "Descending", then the Max X-Coordinate is used.
•"Min/Max Y-Coord.": If the sort order is "Ascending", then the Min Y-Coordinate of the Element is used. If the sort order is "Descending", then the Max Y-Coordinate is used.
•"Min/Max Node ID": If the sort order is "Ascending", then the Min Node ID of the Element is used. If the sort order is "Descending", then the Max Node ID is used.
•"Start Node (i) ID"
•"Start Node (i) X-Coord."
•"Start Node (i) Y-Coord."
•"End Node (j) ID"
•"End Node (j) X-Coord."
•"End Node (j) Y-Coord."
First, the Elements have to be selected. Then we select the "Sort by" field and then the sort order (ascending or descending). Finally, we click the "Renumber" button.
Important: Renumbering is done for the selected Elements. The non-selected Elements remain unchanged. To renumber all Elements, all Elements have to be selected first.
Move/Copy Elements
In order to perform this action, first you have to select the entire row(s) of the corresponding Element(s) and then apply the action.
This tool is used for moving or copying Elements. The user specifies the Move/Copy Vector {V}={dX, dY}.
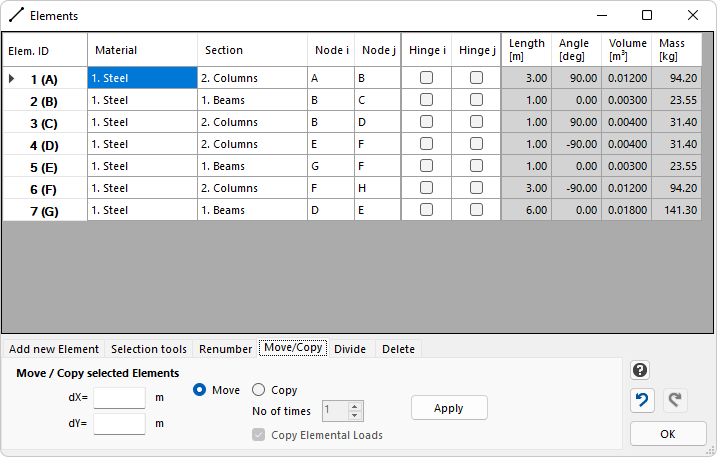
Move Elements
•Multiple Elements (one or more) can be selected to be moved at once.
•Move Elements can only be applied once (only one time), not a number of times (only copy works with the option to apply it over a number of times).
•With the Move command, several Elements can be moved together to new locations. The user defines the move vector as {dX, dY}.
•Elements are moved together with their hinges and any Elemental Loads on them.
•If an Element is moved that is not connected to other Elements, then its start and end nodes are actually moved (see Example 1 below), together with any Constraints, Springs and Nodal Loads on them. As a result, the element moves.
•If an Element is moved that was previously connected to other Elements via common Nodes (Elements that are not selected to move also), then the Element is detached from the other Elements and new Nodes are generated to define its new position. The previous Nodes stay connected with the other Elements, together with any Constraints, Nodal Loads or Springs they had (see Example 1 below).
•If an Element is moved and there is already an existing Node in the new position (either at the start i or at the end j of the new position of the Element, or at both ends i and j), then the existing Node is used for the definition of the Element, i.e. the Element is connected to the existing Node (see Example 2 below).
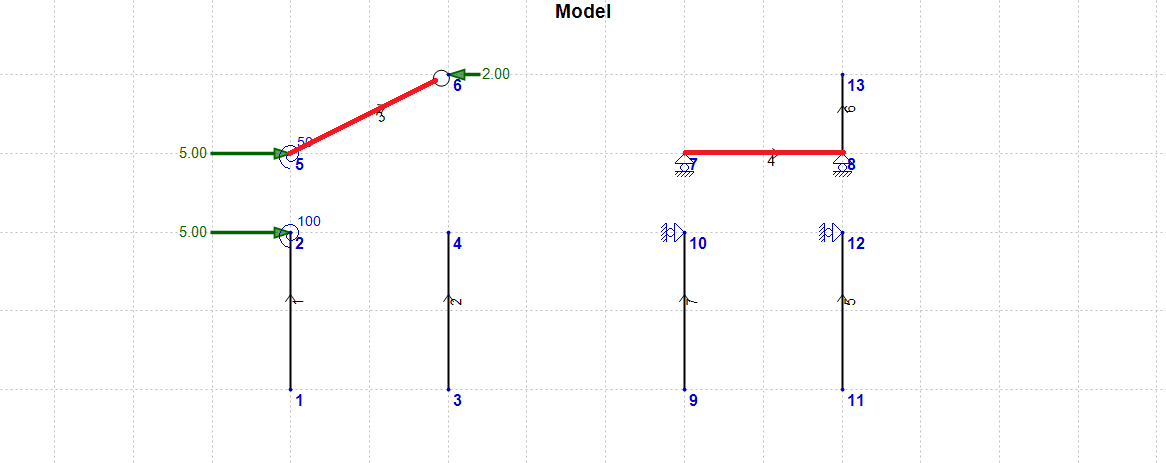
Example 1 - Moving Elements, detaching Elements from Nodes
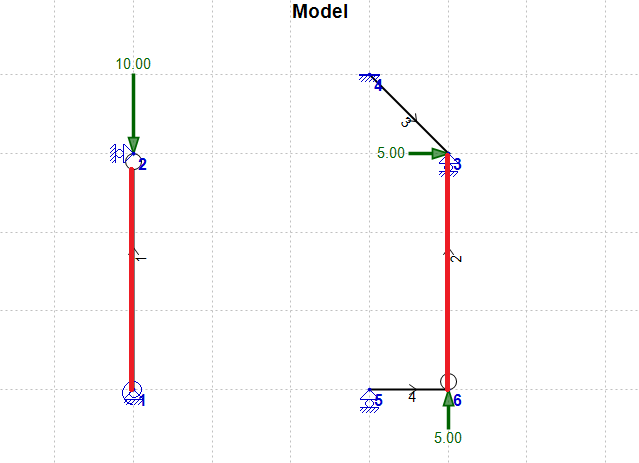
In the above example, Elements 1 and 2 are moved with the vector {DX=1, DY=0}. The result of the operation is the following:
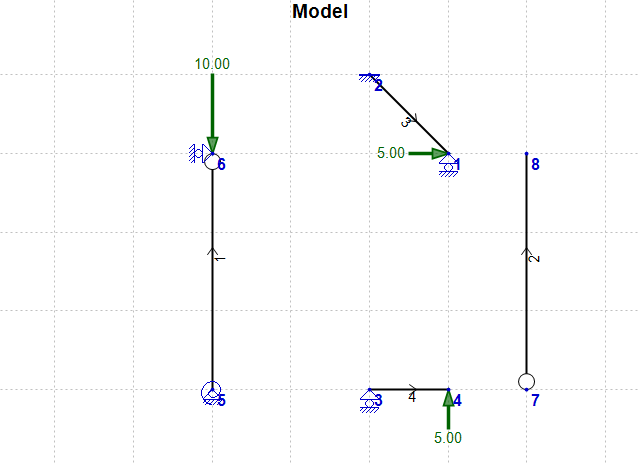
•Element 1 is moved together with its Nodes.
•Element 2 is detached from Elements 3 and 4 and it is now on its own, not connected to other Elements.
•2 new Nodes have been automatically generated for this (Nodes 7 and 8 in the second figure).
•Some Node renumbering has occurred as a result of the operation. You can use the Nodes renumbering tool to renumber Nodes, if needed.
•The Nodal Load on Node 2 is moved together with the Node (numbered as 6 after the operation). The Nodal Loads on Nodes 3 and 6 stay with the old Nodes (numbered as 1 and 4 after the operation).
Example 2 - Moving Elements, attaching Elements to Nodes
In the above example, Elements 3 and 4 are moved with the vector {DX=0, DY=-1}. The result of the operation is the following:
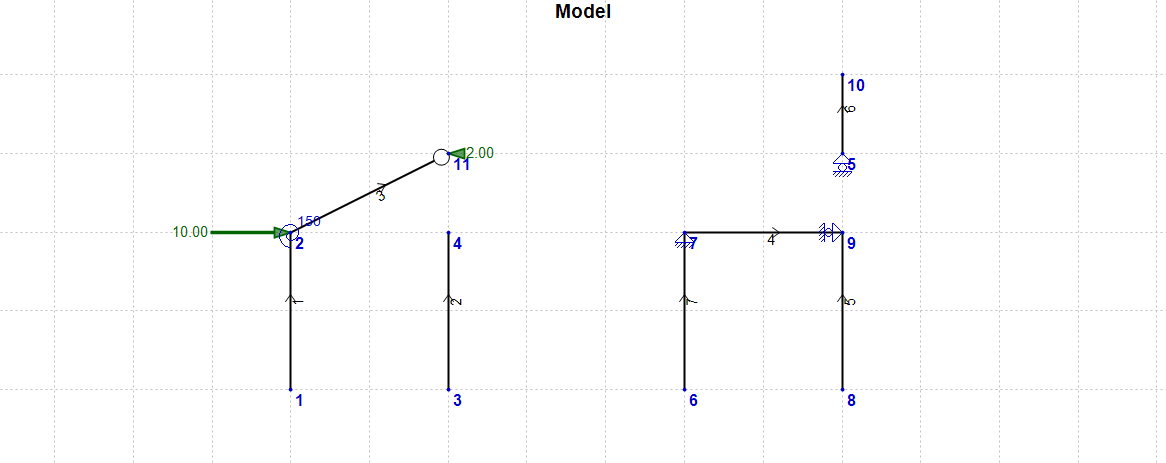
•The start Node i of Element 3 is attached (connected) to the existing Node 2. As a result, Element 3 is now connected to Element 1. Nodal loads and springs are combined in this case. The new Nodal Load on Node 2 is 5+5=10, while the rotational spring has a stiffness of 50+100=150.
•Element 4 is detached from Node 8 (new numbering: Node 5). And now Element 4 is connected to Nodes 10 and 12 (new numbering: Nodes 7 and 9). The two supports are combined on the left part of the element. New Node 7 now has a pinned support, while the previous supports were two rollers that are now combined. Supports are not combined at the right part of the element, as the roller support of Node 8 (new numbering: Node 5) stays behind, together with the Node which is needed for the definition of Element 6.
Copy Elements
•Multiple Elements (one or more) can be selected to be copied at once.
•Copy Elements can be applied multiple times (up to 50) with a single click.
•With the Copy command, several Elements can be copied to new locations. The user defines the copy vector as {dX, dY} and the number of times the operation will be applied.
•If the check box "Copy Elemental Loads" is checked, Elements are copied together with their Elemental Loads.
•Any hinges (start i and/or end j) are copied together with the Elements.
•By default, the "Copy Elemental Loads" check box is checked. This can be changed by the user.
Example 3 – Copying Elements
Copy Elements works similarly with Move Elements, but this time new Elements are created instead of moving already existing ones. See the example below:
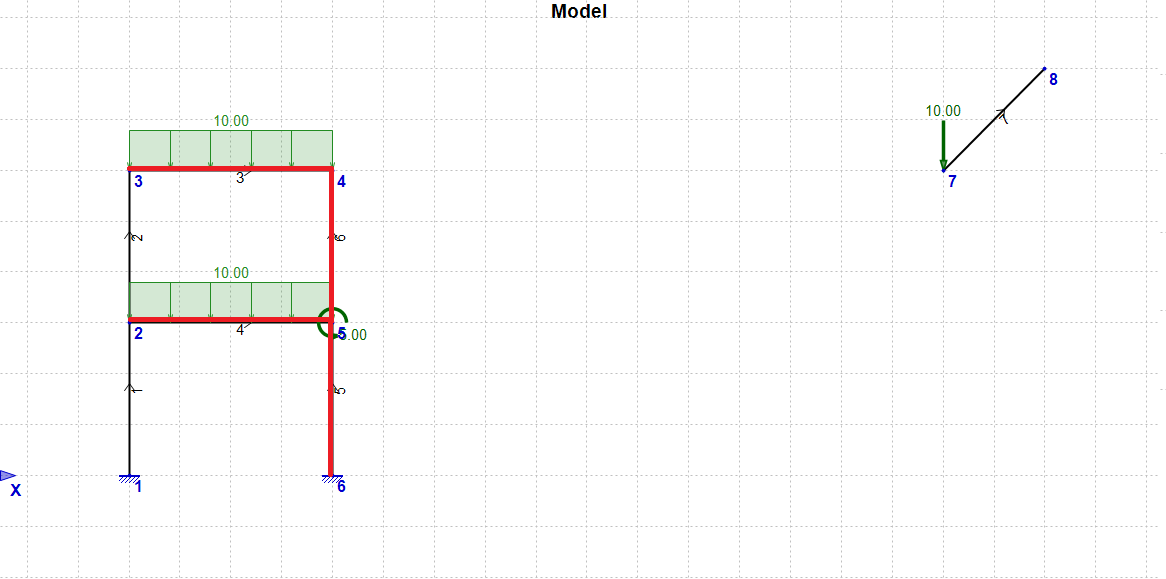
We now copy Elements 3, 4, 5 and 6 with the vector {DX=4, DY=0}, 3 times. The "Copy Elemental Loads" check box is checked. The result of the operation is the following:
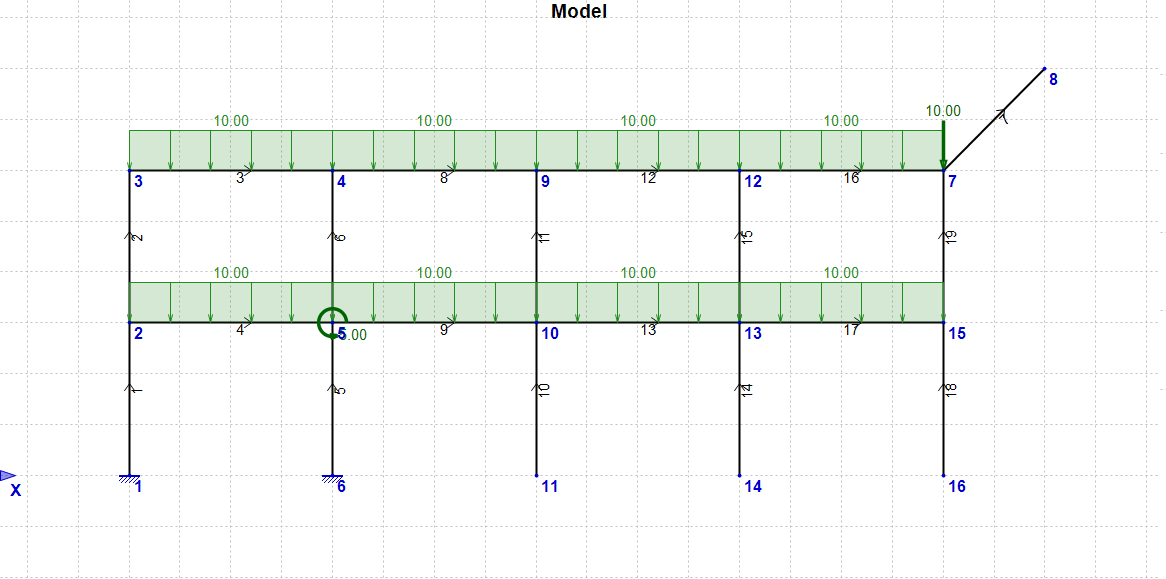
•New Elements and Nodes are created and we now have a fully connected frame structure.
•Node 7 was already at (20, 6) and it is used for the connections of Elements 16 and 19. No new Node is created there, the old Node is instead used.
•Elemental Loads are copied together with the Elements, because the check box "Copy Elemental Loads" was checked.
•This techniques offers a very fast and efficient solution to create structures such as frames, with repeated patterns.
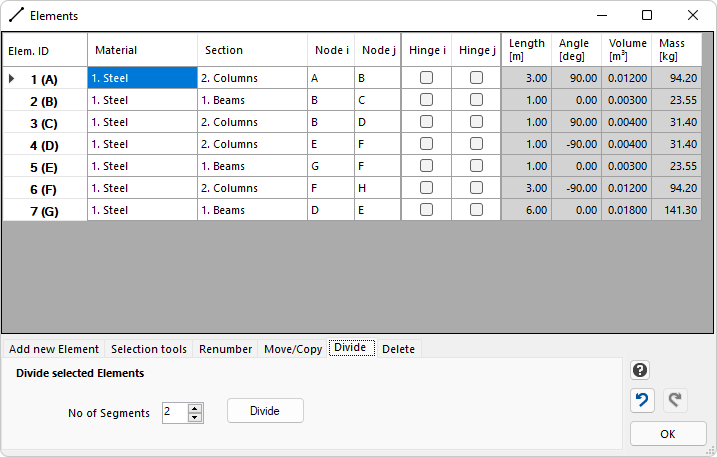
Divide Elements
In order to perform this action, first you have to select the entire row(s) of the corresponding Element(s) and then apply the action.
Select the Elements (rows). Type the number of the division segments (up to 40) and then click the "Divide" button. You can Divide more than one Elements at a time.
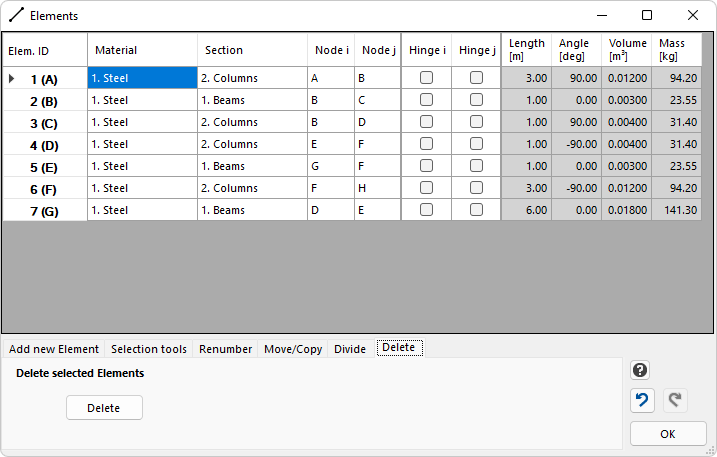
Delete Elements
In order to perform this action, first you have to select the entire row(s) of the corresponding Element(s) and then apply the action.
This tool is used for deleting Elements. First select the Elements (rows) that you want to delete. Then, click the "Delete" button to delete the Elements. You can Delete more than one Elements at a time.